Sometimes it is nice to insert an image into the middle of the main text content in a page. This helps to break up paragraphs and make a page more interesting to the reader. These types of images are often called inline images because they are placed inline with text. You can also add a link to a document or PDF to easily share with your visitors. All of these files are uploaded and managed in the Media Library (you must be logged in to view open this link).
To insert a file into the body area:
STEP 1: PLACE YOUR IMAGE/FILE
Place your cursor where you want the top of the image to start, by clicking once in the body field. For non-image files, place your cursor where you want the file name link to be by clicking once in the body field.
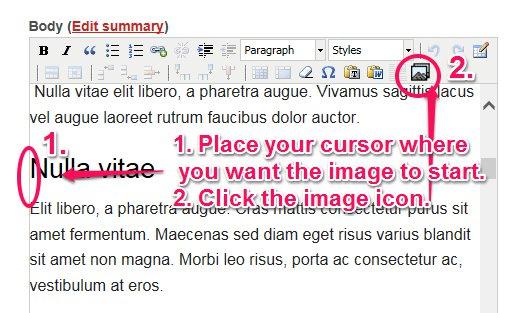
STEP 2: ADD YOUR IMAGE/FILE
Click the Media browser icon in the editing form.
This will open a pop up window:

You can upload any of the allowed file types you see listed in the screenshot above.
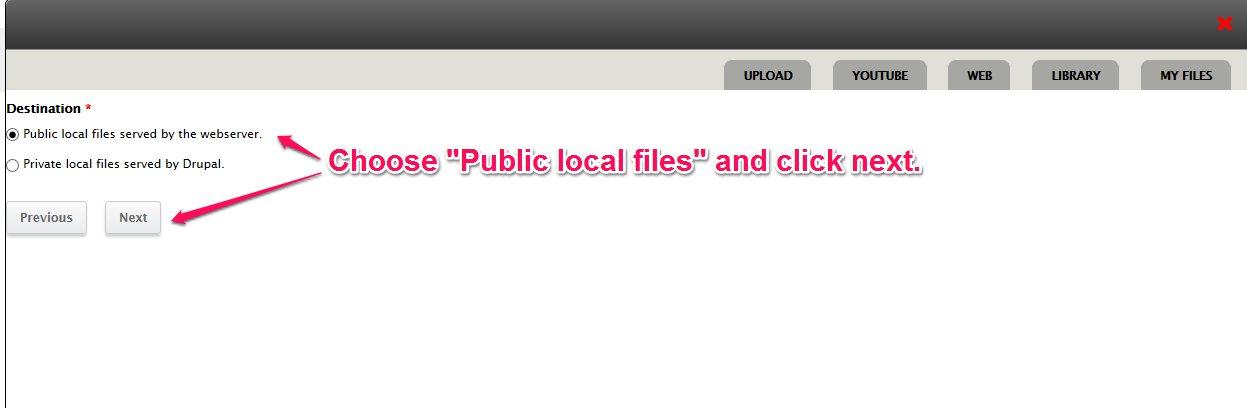
Clicking "Next" brings you to the choice of destination for your file:
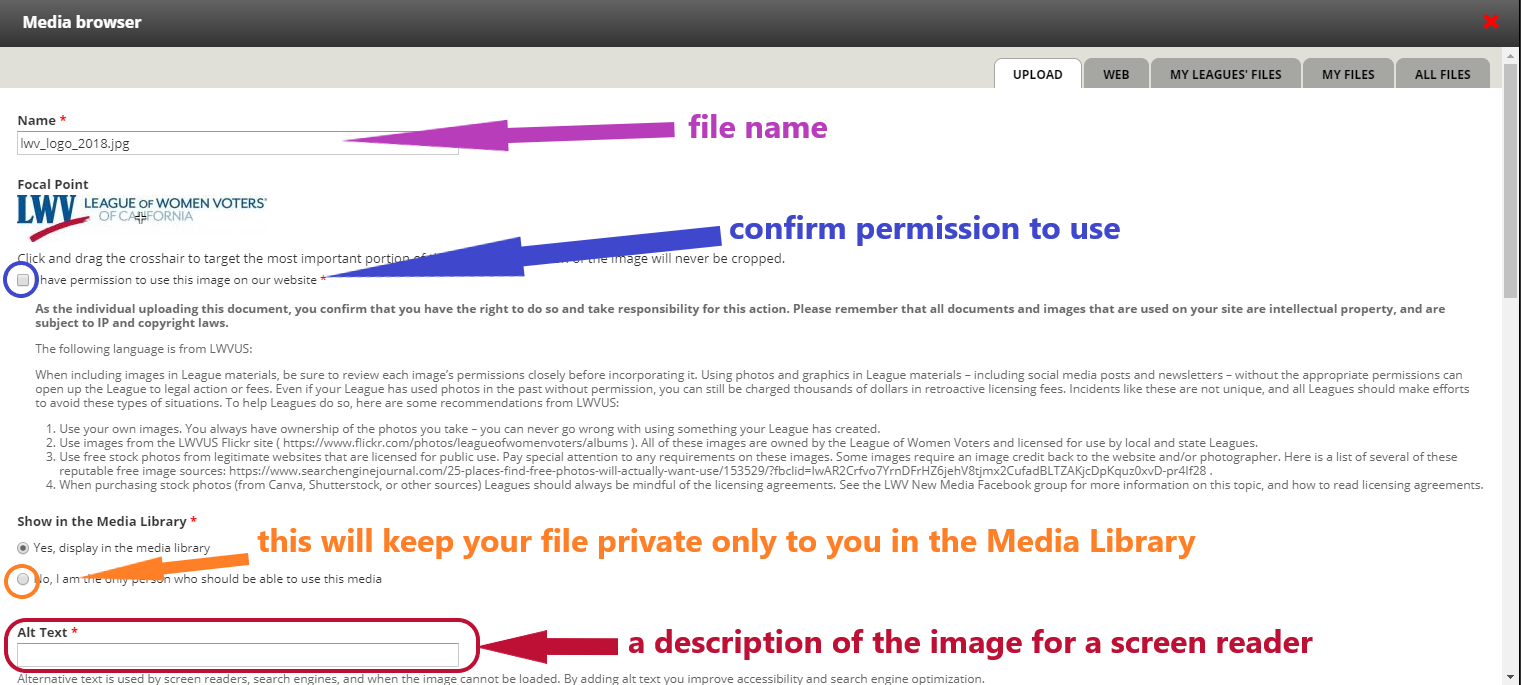
Then you will see the page on which you can add metadata for your file.
For all files, you are required to confirm your permission to use this image or document on your website.
The option to Show in the Media Library is chosen by default--you can hide this file from the Media Library by selecting 'No...' so that is it only for your use.
All files are also required to have at least 1 MEDIA TAG.
EXAMPLE OF A NON-IMAGE FILE UPLOAD

For images, you are also required to assign ALT TEXT.
EXAMPLE OF IMAGE UPLOAD

Media tags are required for each file you upload. These are described in more detail in the description of how to use the MEDIA LIBRARY.
For your image, be sure you've selected at least 1 media tag, added Alt text, and checked off your permission of use. For non-image files, select at least 1 media tag, and check off your permission of use.
You can add additional information (i.e. Title, Description, Related Issues) to help for future searches in the Media Library.
Once you've added/selected all necessary information, click Save.
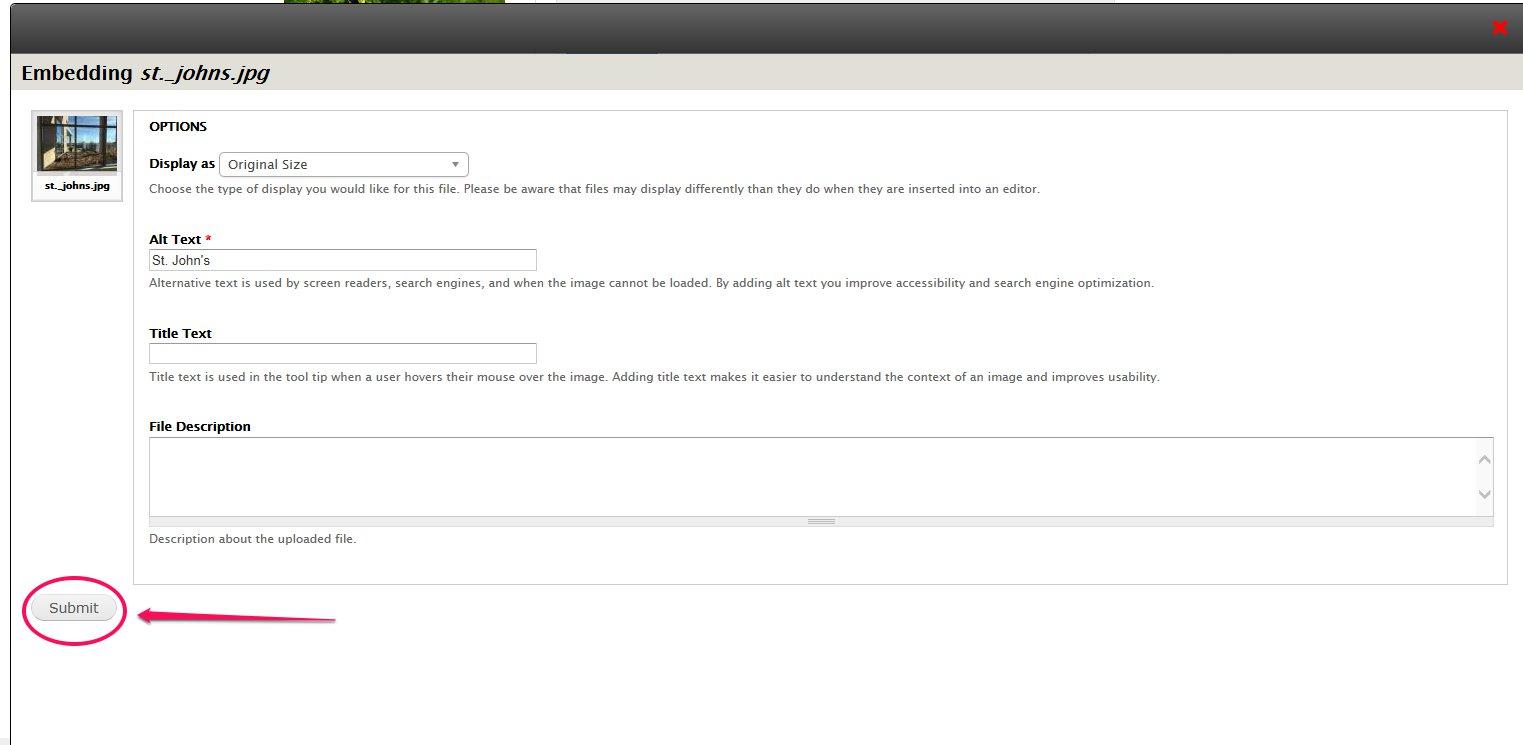
This will produce a confirmation screen. Click Submit. If you've selected an image, this will place it in the body of the text. For non-image files, this will place a link to view the file in a separate window.
Resizing Images
You can edit the size of an existing image by simply clicking on the image to highlight it, then using the resize border that appears around the perimeter of the image, drag the corner until you reach your desired size. Firefox browsers